Setup - Configure Authentication Methods (All Platforms)
🔐 Authentication Overview
AeroKites Edu supports multiple authentication methods to provide flexibility and security for users. All authentication methods are configured in the same Firebase Authentication page, making setup straightforward and centralized.
Step 9: Configure Authentication Methods
This step covers the configuration of all authentication methods in Firebase Console. Since all methods are managed in the same place, we'll configure them together for efficiency.
⚠️ Important: Authentication configuration is essential for user login functionality. Without proper setup, users won't be able to access the app.
1Access Firebase Authentication
Start by accessing the Firebase Authentication section:
- Go to the Firebase Console
- Select your project
- Click on Authentication in the left sidebar
- Click on the Sign-in method tab
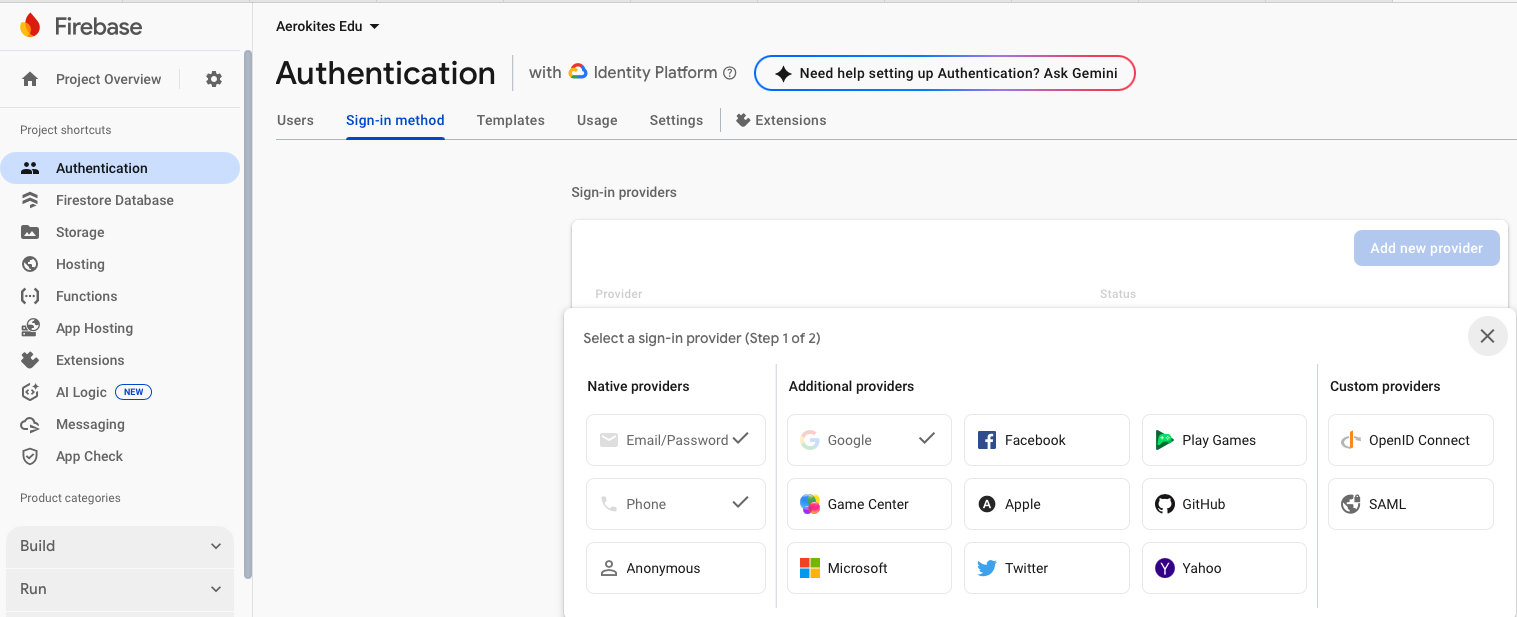
2Configure Authentication Methods
You'll see a list of available sign-in providers. Click on each method you want to enable and configure:
🔵 Google Sign-In Configuration
- Click on Google in the sign-in providers list
- Click the Enable toggle to activate Google Sign-In
- Click Save to apply the changes
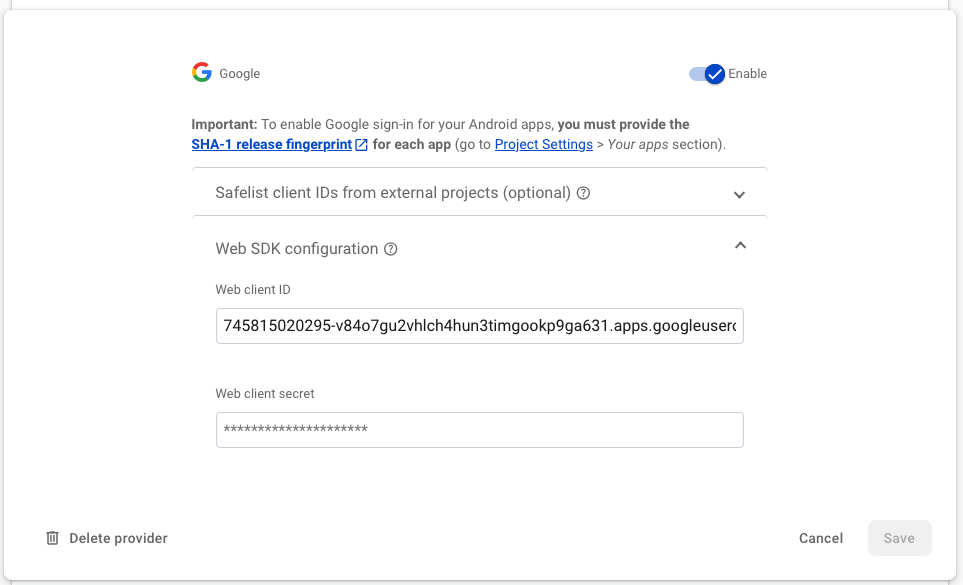
⚠️ Important for Android: To enable Google sign-in for your Android apps, you must provide the SHA-1 release fingerprint for each app. Go to Project Settings > Your apps section to add this.
Web Client ID (Auto-generated)
After enabling, Firebase automatically generates the Web Client ID. You can view it by clicking the edit icon next to Google Sign-In in the Firebase Console.
💡 Pro Tip:
The Web Client ID is automatically generated when you enable Google Sign-In. You'll need this ID for your Flutter app configuration.
🍎 Apple Sign-In Configuration
- Click on Apple in the sign-in providers list
- Click the Enable toggle to activate Apple Sign-In
- Click Save to apply the changes
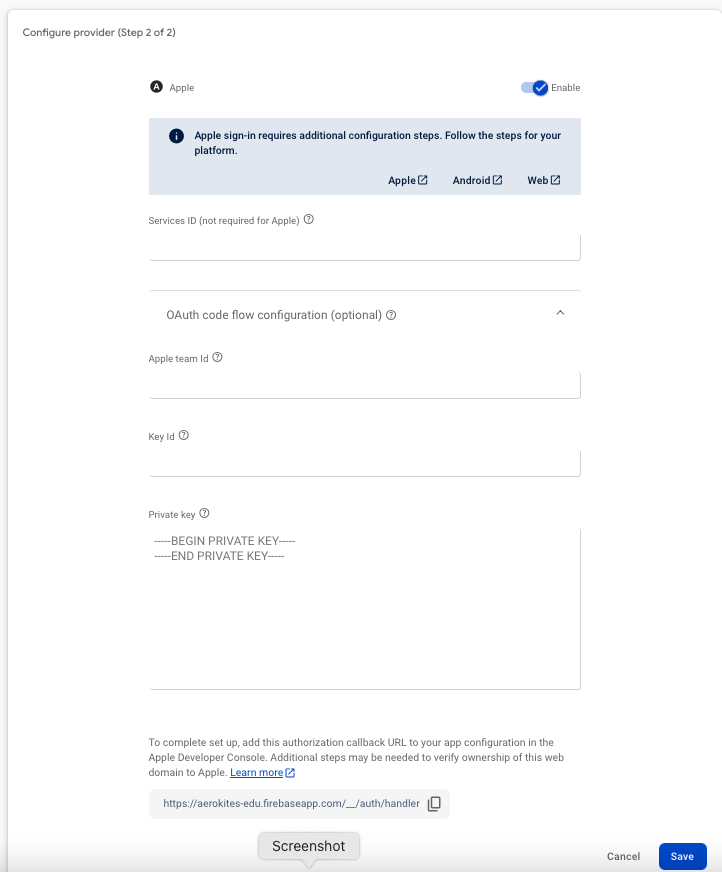
🔒 Important: Apple Sign-In requires additional configuration steps. Follow the steps for your platform (Apple, Android, Web) as shown in the Firebase console.
Apple Developer Console Setup
To configure Apple Sign-In using Firebase Authentication (after enabling the provider in the Firebase Console), follow these quick, clear steps. This assumes you have an Apple Developer account ($99/year enrollment required) and your app's bundle ID set up. These steps cover both Apple Developer Console and Firebase Console setup for cross-platform support (iOS, Android, Web in Flutter apps).
Step 1: Apple Developer Console Setup
- Log in to developer.apple.com/account.
- Go to Certificates, Identifiers & Profiles.
- Under Identifiers, click "+" to create a new one:
- Select App IDs > Continue.
- Enter description and bundle ID (e.g., com.example.app).
- Enable Sign in with Apple capability > Register.
- (For web/Android support) Create another identifier:
- Select Services IDs > Continue.
- Enter description and identifier (e.g., com.example.service) > Enable Sign in with Apple > Configure (add your app's domain and return URLs, e.g., https://your-firebase-app.firebaseapp.com/__/auth/handler) > Save.
- Under Keys, click "+" to create a new key:
- Enable Sign in with Apple > Configure (associate with your App ID/Services ID) > Download the .p8 file.
- Note the Key ID (from the key details) and your Apple Team ID (top-right in Account page, e.g., 123ABCDEF).
Step 2: Firebase Console Configuration
After completing the Apple Developer Console setup, return to Firebase Console to complete the configuration:
- In Firebase Console > Authentication > Sign-in method, click the edit icon next to Apple Sign-In.
- Enter the following details from your Apple Developer Console:
- Services ID: The identifier you created for web/Android support
- Apple Team ID: Your Apple Developer Team ID
- Key ID: The key identifier from your downloaded .p8 file
- Private Key: Copy and paste the contents of your downloaded .p8 file
- Click Save to complete the Apple Sign-In configuration.
💡 Important Notes:
- Bundle ID: Must match exactly with your Flutter app's bundle identifier
- Services ID: Required for web and Android platforms
- Private Key: Keep your .p8 file secure and never share it publicly
- Team ID: Found in the top-right corner of your Apple Developer account page
Step 3: iOS Xcode Configuration
For iOS apps, you need to add the Sign in with Apple capability in Xcode:
- Open your Flutter project in Xcode (open
ios/Runner.xcworkspace) - Select Runner in the project navigator
- Go to Signing & Capabilities tab
- Click "+ Capability" button
- Search for and select "Sign in with Apple"
- This will automatically add the required entitlements to your app
📧 Email/Password Configuration
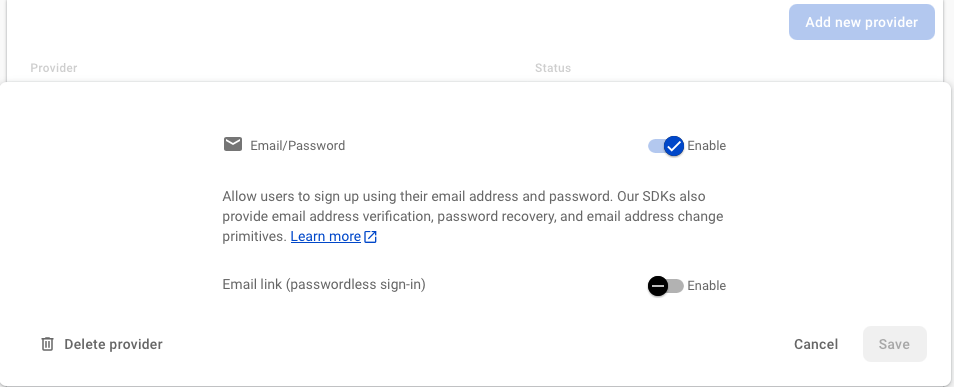
- Click on Email/Password in the sign-in providers list
- Click the Enable toggle to activate Email/Password authentication
- Optionally enable Email link (passwordless sign-in) if you want passwordless authentication
- Click Save to apply the changes
💡 Pro Tip:
Email/Password authentication is the foundation for Email OTP login. Users can reset passwords and use OTP verification with this method enabled.
3Flutter Project Configuration (Automatic)
After configuring Firebase Authentication, your Flutter project is automatically configured to use the configured methods. The app uses firebase_options.dart for all platform-specific configurations.
Google Sign-In Configuration
Google Sign-In is automatically configured in your firebase_options.dart file:
💡 How It Works:
The app automatically detects the platform and uses the appropriate client ID:
- Web: Uses
DefaultFirebaseOptions.webClientId - iOS: Uses
DefaultFirebaseOptions.ios.iosClientId - Android: Uses
DefaultFirebaseOptions.ios.androidClientId
Google Sign-In iOS Configuration
For iOS Google Sign-In to work, you MUST add the GIDClientID to your Info.plist:
⚠️ Critical: Without this configuration, Google Sign-In will fail with the error "No active configuration. Make sure GIDClientID is set in Info.plist."
How to get your Client ID:
- Open your
GoogleService-Info.plistfile - Find the
CLIENT_IDkey - Copy the value (e.g.,
745815020295-non6k22kaq78f025mvi8lfkpg7o9cf5k.apps.googleusercontent.com) - Add it to your
Info.plistas shown above
Apple Sign-In Configuration
For iOS, ensure your Info.plist includes:
Authentication Implementation Details
Your app uses a centralized authentication system:
🔧 Key Features:
- Platform Detection: Automatically uses correct client ID for each platform
- Centralized Service: All authentication logic in
AuthService - Smart Detection: Prevents duplicate accounts with different sign-in methods
- FCM Integration: Automatically registers FCM tokens after successful authentication
4Test Authentication Methods
After configuration, test each authentication method:
- Run your Flutter app:
flutter run - Navigate to the login screen
- Test each enabled authentication method
- Verify that users can successfully authenticate
Common Issues & Solutions
❌ "Google Sign-In not working" Error
Solution: Verify that Google Sign-In is enabled in Firebase Console and the Web Client ID is correctly configured in your code.
❌ "No active configuration. Make sure GIDClientID is set in Info.plist" Error
Solution: Add the GIDClientID to your iOS Info.plist file. Copy the CLIENT_ID from your GoogleService-Info.plist and add it as shown in the Google Sign-In iOS Configuration section above.
❌ "Apple Sign-In not working" Error
Solution: Check that Apple Sign-In capability is added in Xcode, Info.plist is properly configured, and Apple Sign-In is enabled in Firebase Console.
❌ "Email authentication failed" Error
Solution: Ensure Email/Password authentication is enabled in Firebase Console and your SMTP settings are properly configured.
❌ "OAuth consent screen verification required" Error
Solution: For production use, verify your OAuth consent screen in Google Cloud Console. See the detailed guide below.
OAuth Consent Screen Verification (Production)
📢 Important for Production: Google Sign-In requires OAuth consent screen verification for production use with external users.
Follow these steps to verify your OAuth consent screen:
- Go to Google Cloud Console
- Select your project and navigate to APIs & Services > OAuth consent screen
- Ensure your app is set to Production mode (not Testing)
- Provide a privacy policy URL and submit for verification
- Follow Google's verification process (may take several days)
🔗 OAuth App Verification Documentation
For complete OAuth app verification requirements and process, refer to Google's official documentation:
📖 Google OAuth App Verification Guide
Key Points:
- Non-sensitive scopes: No verification required
- Sensitive scopes: Verification required before publishing
- Restricted scopes: Annual re-verification required
- Brand verification: Optional for displaying app name and logo
Authentication Flow Overview
🔄 How Authentication Works in AeroKites Edu:
- Admin-Controlled Invitations: Admins create accounts based on email invites for parent and staff users, following modern security best practices.
- User Account Control: Users have full control over their account login methods and can choose their preferred authentication method.
- Multiple Sign-In Options: Users can sign in using Google, Apple, or Email OTP.
- Account Linking: After first authentication, user records are linked to their Firebase UID. Users can also link additional authentication methods in their profile screen account settings.
- Password Management: Users can reset passwords using the reset link on the login page.